# Preparing Your Player

For many games you will want to have a player object for each client. This guide will walk you through the process step by step.

{% hint style="success" %}
Before You Begin\
Ensure that you're **not in Play Mode** in the Unity Editor. Making changes during Play Mode will not persist after exiting.
{% endhint %}

{% stepper %}
{% step %}

#### Create a player game object

In the Unity Scene Hierarchy, create a new 3D object of type **Capsule**.\
Select the capsule in the Hierarchy and rename it to **Player**.\
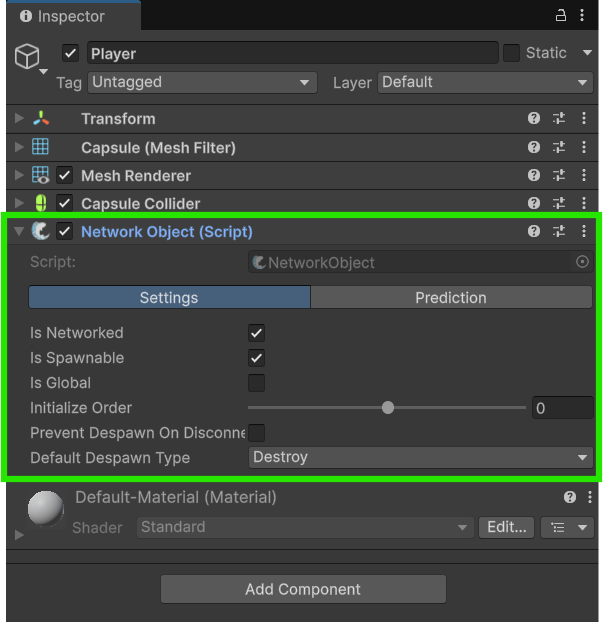
In the **Inspector**, click on **Add Component** and search for **NetworkObject**.\
Add the **NetworkObject** component to the capsule.

{% hint style="info" %}
The **NetworkObject** component is required for linking a game object over the network. It enables the object to synchronize its state across clients and the server.
{% endhint %}

<figure><img src="/files/DOvCacniUid0Sfgj26Ln" alt="NetworkObject component added to capsule"><figcaption><p>NetworkObject component added to capsule</p></figcaption></figure>
{% endstep %}

{% step %}

#### Setup the player object for spawning

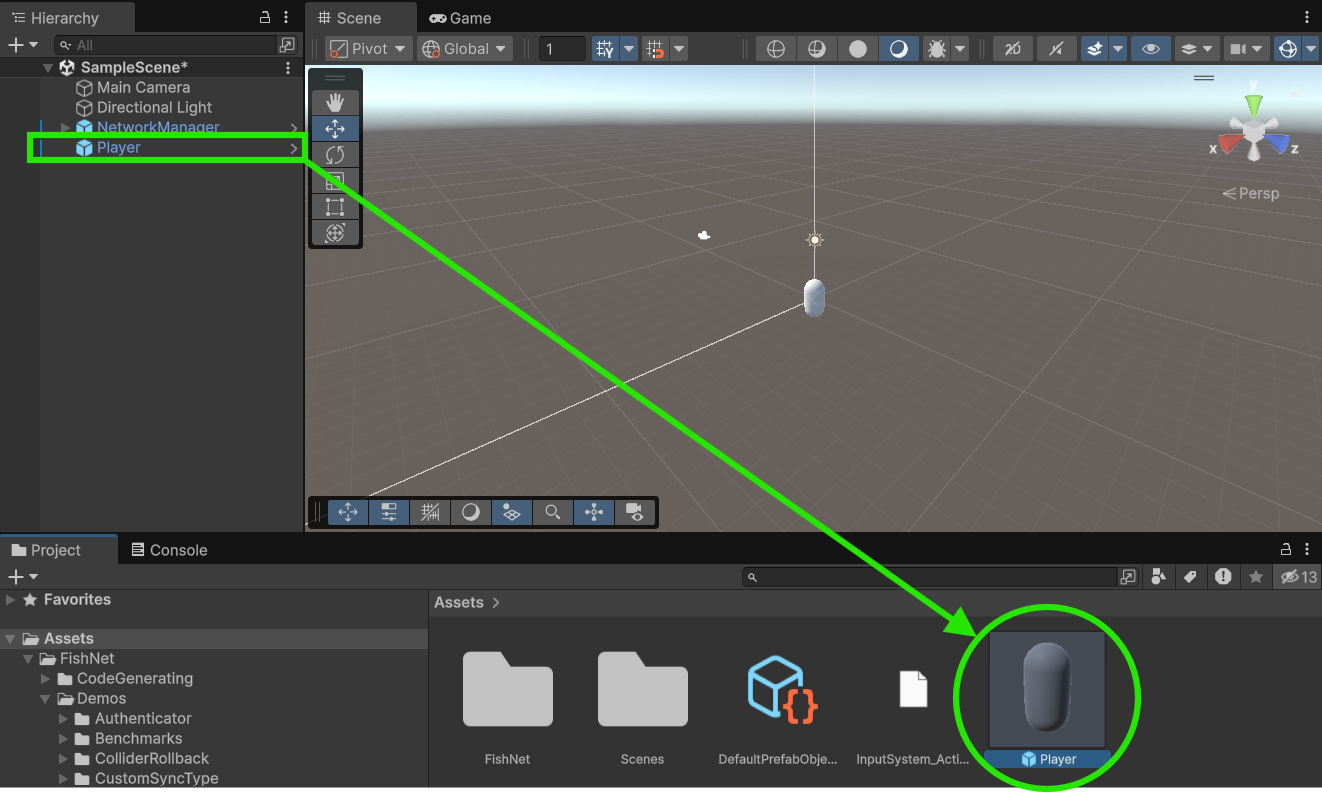
Drag the player game object into the project window to turn it into a prefab, then delete the game object from the scene.

<figure><img src="/files/J9NkzD8mTCHqcVdcEtO3" alt="Turn the Player Object into a Prefab"><figcaption><p>Turn the player object into a prefab</p></figcaption></figure>

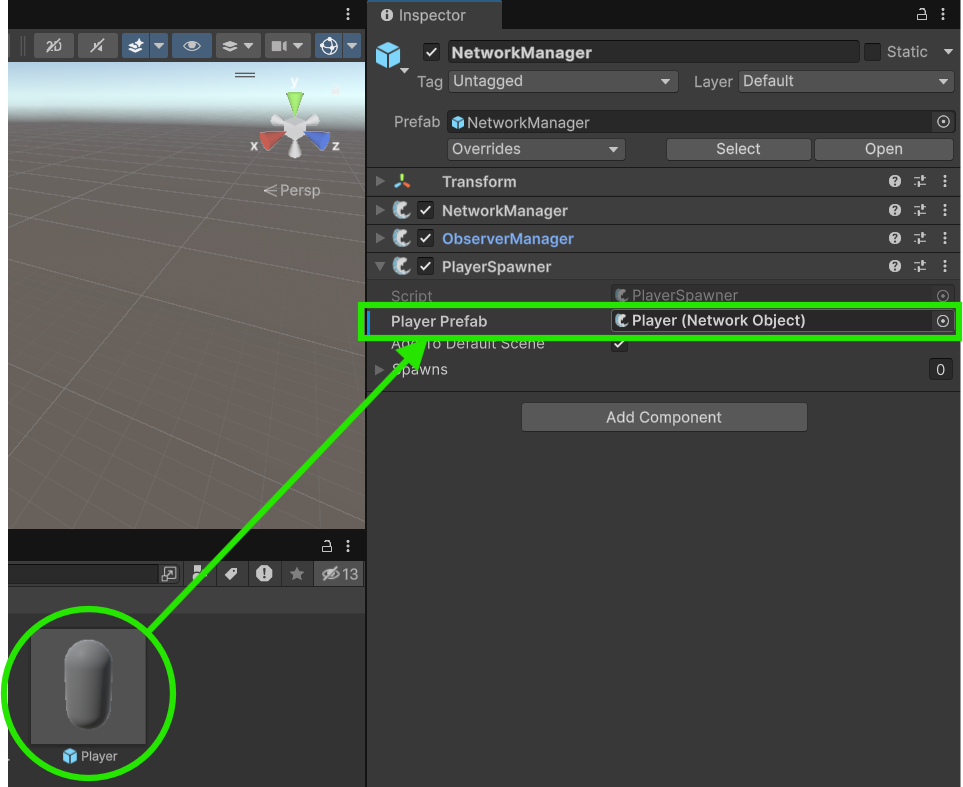
Select the NetworkManager in the scene and assign your new Player prefab into the **Player Prefab** field on the **PlayerSpawner** component.

<figure><img src="/files/qOcpP94HcSYPjwYMGVfu" alt="Assign Player Prefab in Player Spawner"><figcaption><p>Assign player prefab in PlayerSpawner</p></figcaption></figure>
{% endstep %}

{% step %}

#### Add spawn points

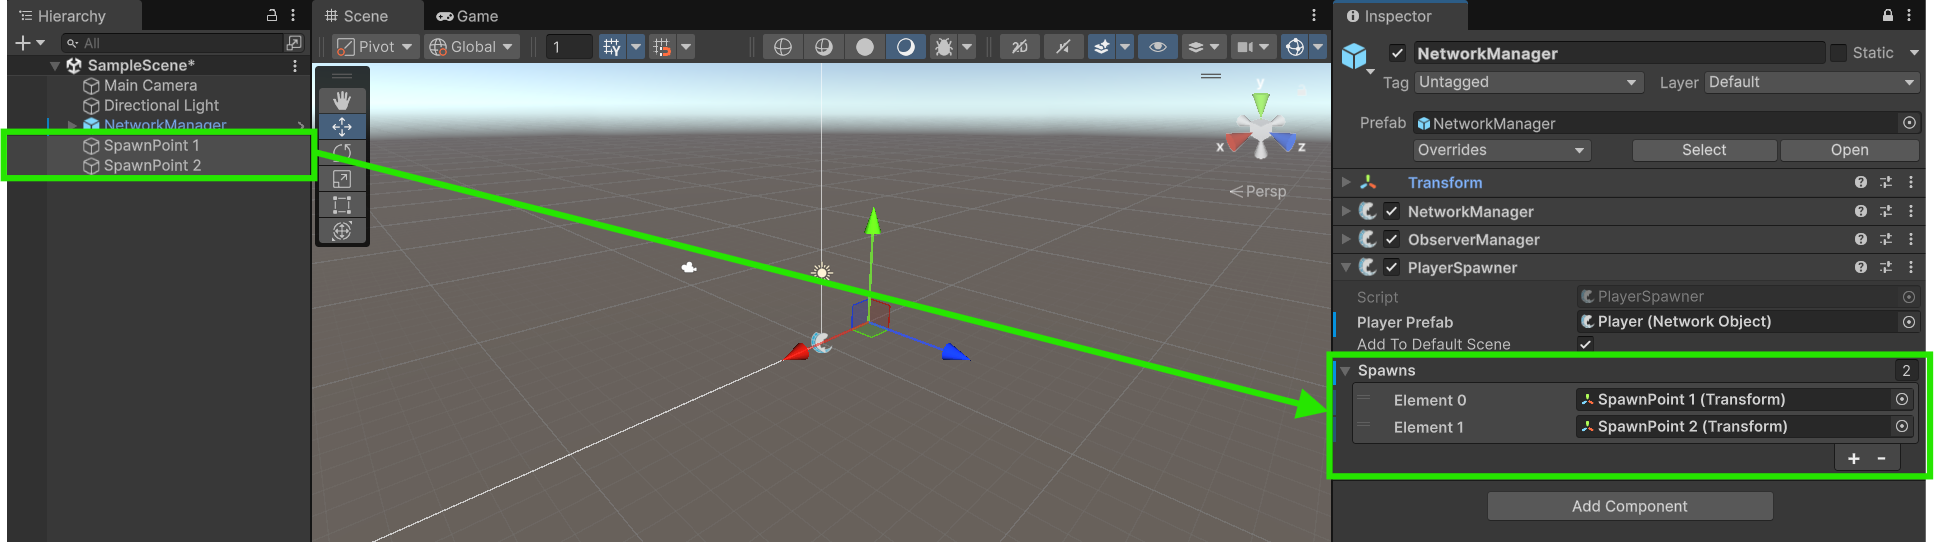
Create two empty Game Objects in the scene to act as spawn points. Position them where you'd like players to spawn on the map.\
Add these Game Objects as **Transform** references to the **PlayerSpawner** component in the **Spawns** list field.

{% hint style="info" %}
The **PlayerSpawner** uses these transforms to determine spawn locations, choosing them in order from top to bottom for each subsequent player and beginning again after reaching then final spawn point. If no spawn points are specified, the spawner defaults to using the prefab's transform properties for placement.
{% endhint %}

<figure><img src="/files/2mTGoDDeRFwbykRnN5Dc" alt="Create and Assign Spawn Points"><figcaption><p>Create and assign spawn points</p></figcaption></figure>
{% endstep %}

{% step %}

#### Test the player spawning

Save the scene and press the **Play** button in the Unity Editor.\
As soon as the server and client starts you should see the a capsule spawning as the player object at the location of the first spawn point.\
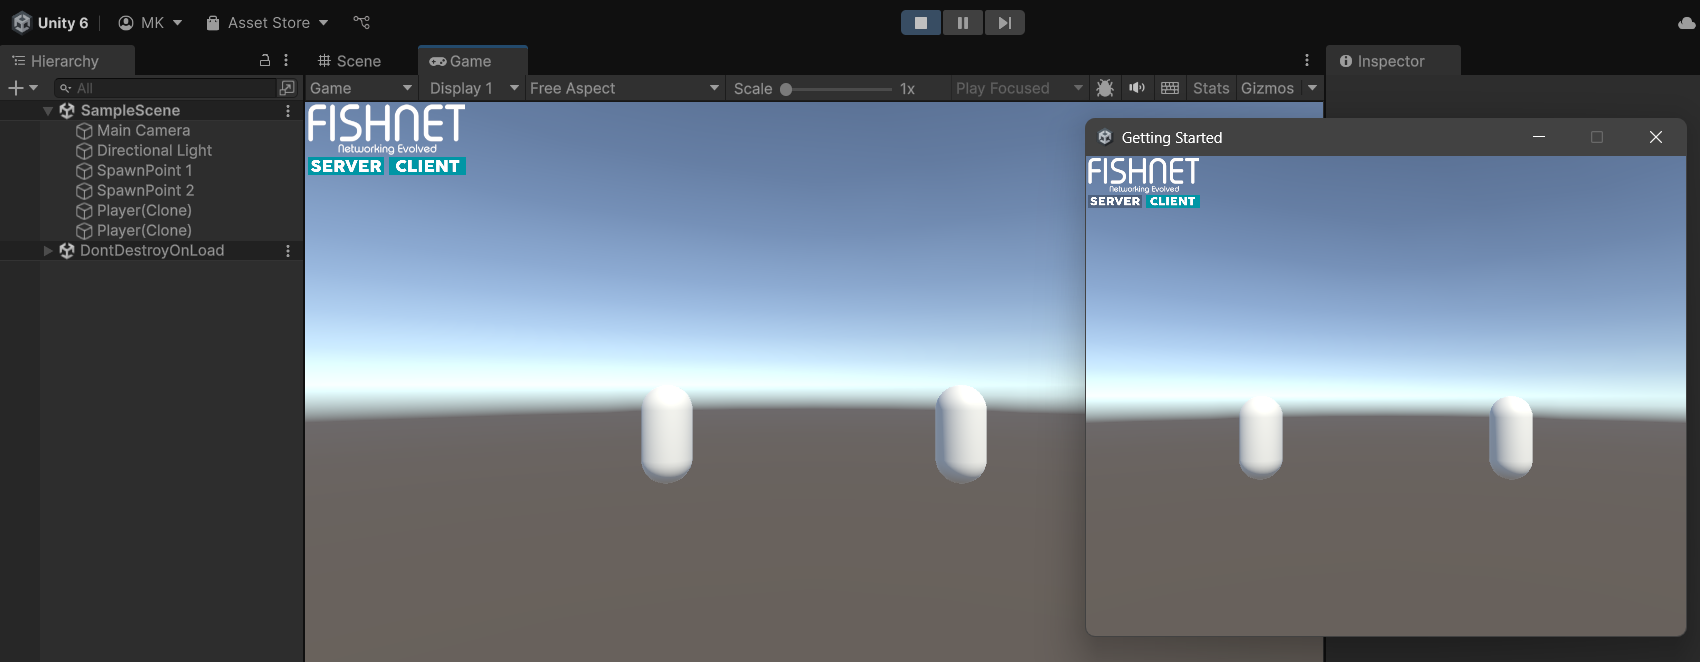
To see another player spawn you can build and run the game and which will then automatically connect as a client to the editor. You should then see a second player capsule spawn for the second player at the second spawn point.

<figure><img src="/files/ZNGJ8iC2visff7jsc05p" alt="Built Game Connected to Editor"><figcaption><p>Built game connected to editor</p></figcaption></figure>

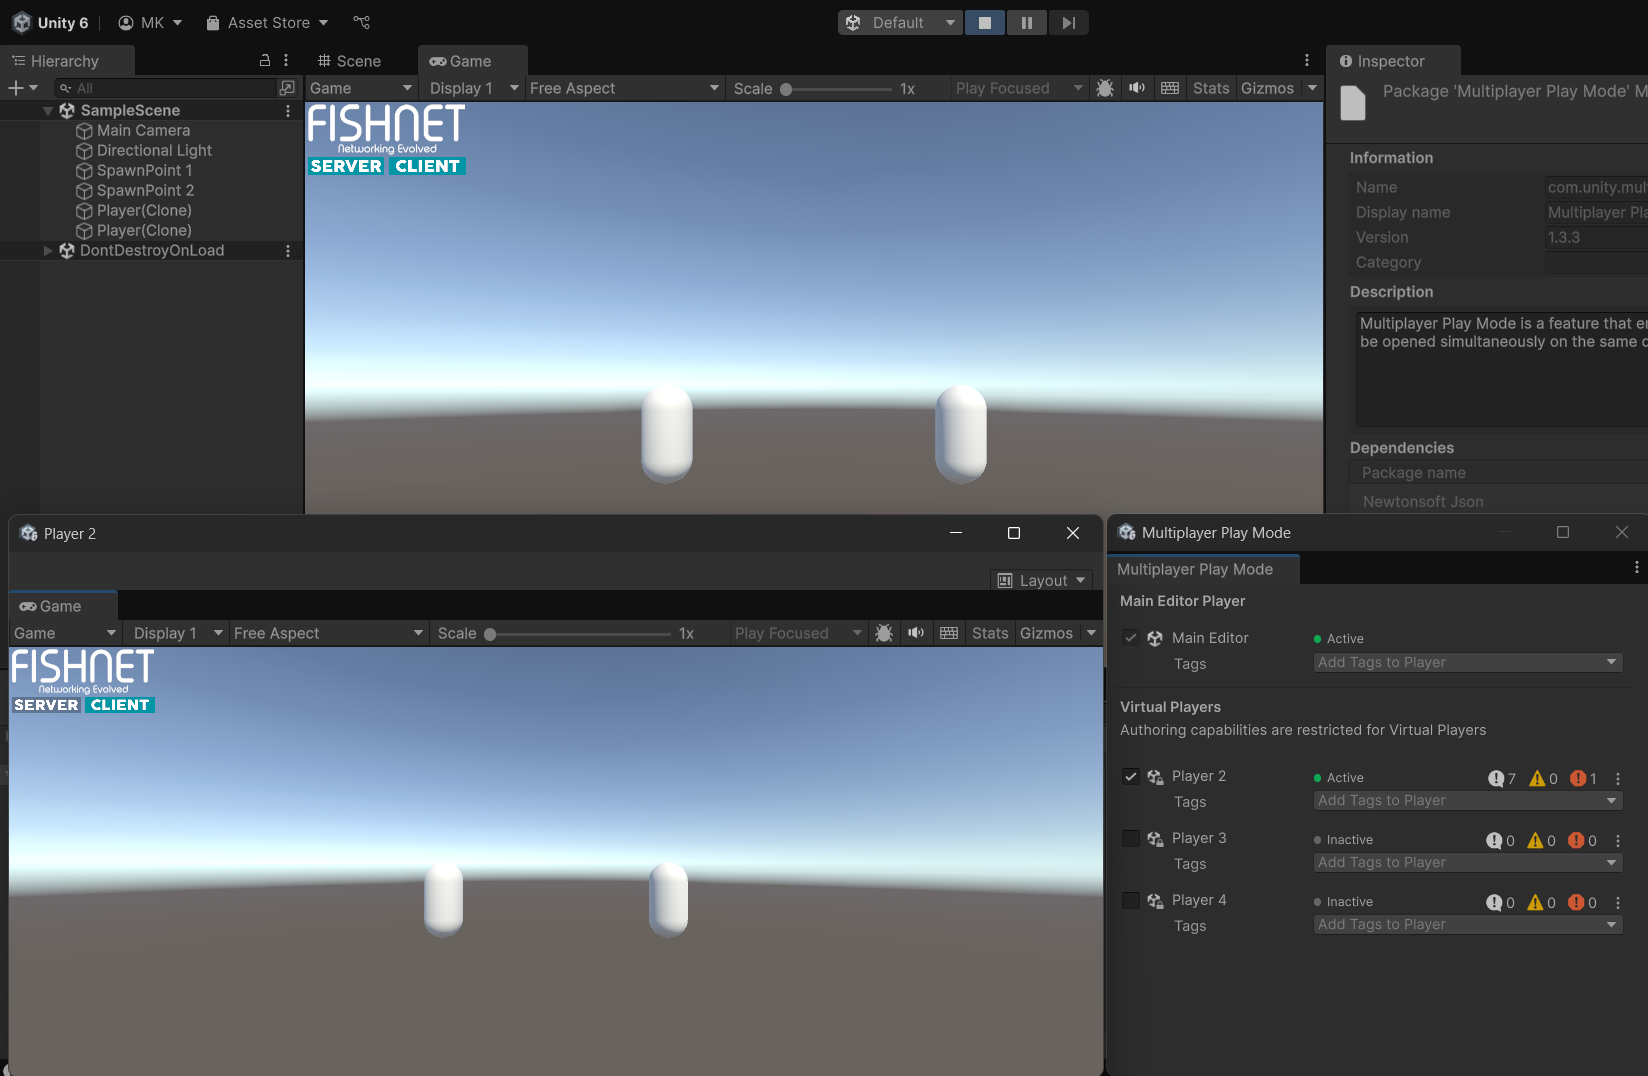
Alternatively, you can launch a second Unity Editor instance by using [Unity's Multiplayer Play Mode](https://docs-multiplayer.unity3d.com/mppm/current/about/) package or a third party package such as [ParrelSync](https://github.com/VeriorPies/ParrelSync?tab=readme-ov-file#parrelsync). Find out more about these options and how to use them with this tutorial: [Testing with Multiple Editors](/docs/tutorials/simple/testing-with-multiple-editors.md).

<figure><img src="/files/IURwIWrf8EnE24nRToqJ" alt="Multiplayer Play Mode Connected to Editor"><figcaption><p>Multiplayer Play Mode connected to editor</p></figcaption></figure>

{% hint style="info" %}
Don't worry if you encounter an error in a second game window stating: **"Server failed to start. This usually occurs when the specified port is unavailable, be it closed or already in use."** This occurs because multiple game instances are attempting to start as a server on the same machine using the same port. Only the first instance will successfully start as a server and the rest will instead start as clients only, thus this error is safe to ignore for local testing.
{% endhint %}
{% endstep %}
{% endstepper %}

{% hint style="info" %}
Download the project files with these completed steps here, or explore the repository:

<a href="https://github.com/maxkratt/fish-networking-getting-started/releases/download/preparing-your-player-complete/preparing-your-player.unitypackage" class="button primary" data-icon="down-to-line">Source Files</a> <a href="https://github.com/maxkratt/fish-networking-getting-started/tree/preparing-your-player" class="button secondary" data-icon="github">Repository</a>
{% endhint %}


---

# Agent Instructions: Querying This Documentation

If you need additional information that is not directly available in this page, you can query the documentation dynamically by asking a question.

Perform an HTTP GET request on the current page URL with the `ask` query parameter:

```
GET https://fish-networking.gitbook.io/docs/tutorials/getting-started/preparing-your-player.md?ask=<question>
```

The question should be specific, self-contained, and written in natural language.
The response will contain a direct answer to the question and relevant excerpts and sources from the documentation.

Use this mechanism when the answer is not explicitly present in the current page, you need clarification or additional context, or you want to retrieve related documentation sections.