> For the complete documentation index, see [llms.txt](https://fish-networking.gitbook.io/docs/llms.txt). Markdown versions of documentation pages are available by appending `.md` to page URLs; this page is available as [Markdown](https://fish-networking.gitbook.io/docs/tutorials/getting-started/setting-up-a-camera/basic-setup-with-cinemachine.md).

# Basic Setup with Cinemachine

Managing a Cinemachine Camera in multiplayer.

This guide will show you one way you can set-up your player camera for multiplayer when you are using the Cinemachine package.

{% stepper %}
{% step %}

### **Installing Cinemachine**

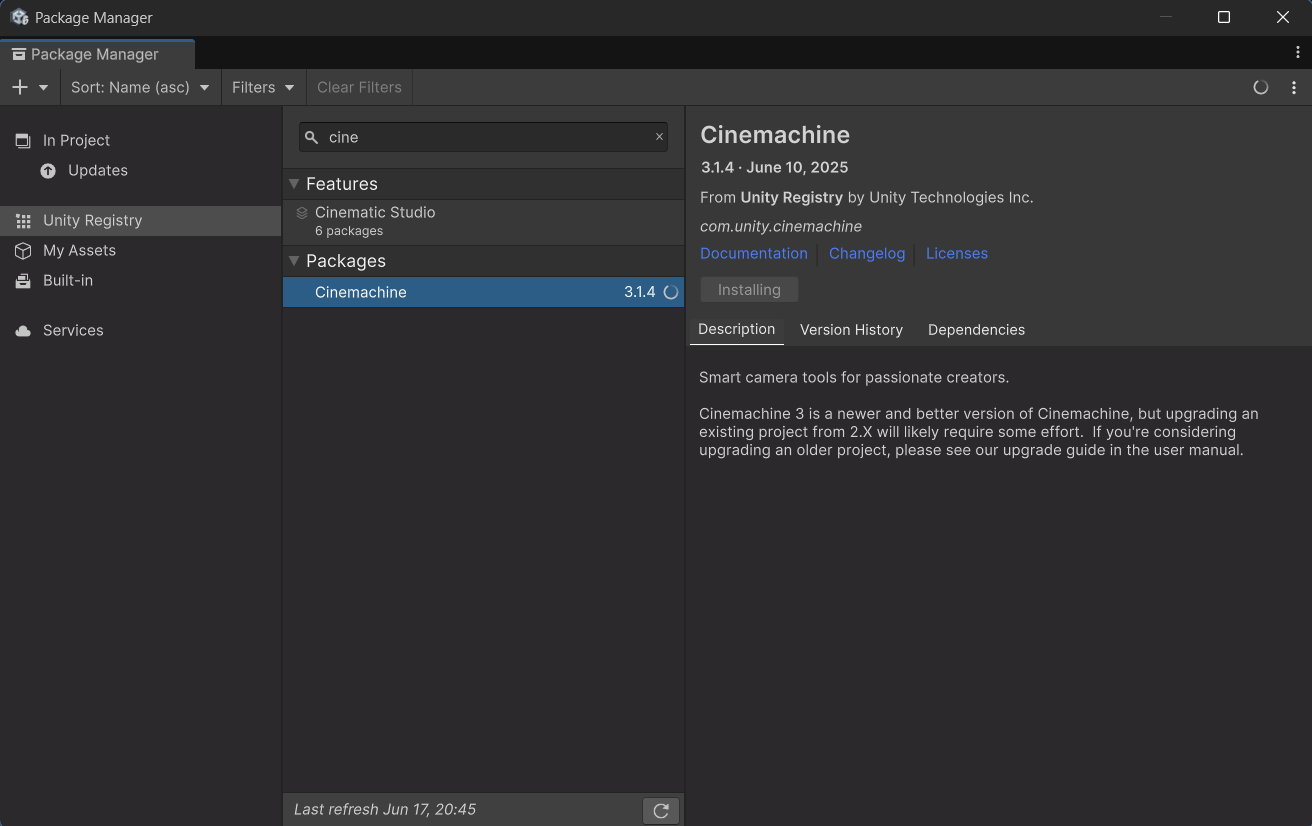
The first step — if you haven't done so already — is to install [Cinemachine](https://unity.com/features/cinemachine) through the [Unity Package Manager](https://learn.unity.com/tutorial/the-package-manager).

<figure><img src="https://1328095063-files.gitbook.io/~/files/v0/b/gitbook-x-prod.appspot.com/o/spaces%2F-MheH2hMo3djr9VSyxTE%2Fuploads%2Fgit-blob-f0a294bfb830fda285fc24f3d49b4a8d09d268c5%2Finstalling-cinemachine.png?alt=media" alt=""><figcaption><p>Cinemachine installing</p></figcaption></figure>
{% endstep %}

{% step %}

### **Adding the Cinemachine Brain**

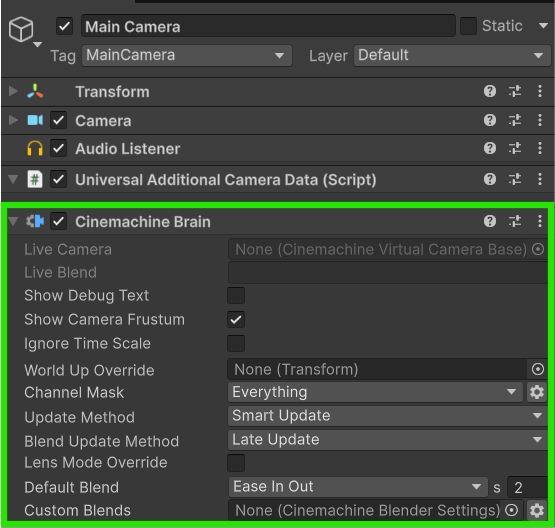
Now that we have **Cinemachine** installed we can set it up. Add the **Cinemachine Brain** component to the **Main Camera** game object in the scene.

<figure><img src="https://1328095063-files.gitbook.io/~/files/v0/b/gitbook-x-prod.appspot.com/o/spaces%2F-MheH2hMo3djr9VSyxTE%2Fuploads%2Fgit-blob-980e6a9c0e66c4a089c8f2eaf832b7f948cb9de0%2Fadded-cinemachine-brain.png?alt=media" alt=""><figcaption><p><strong>Cinemachine Brain</strong> added to <strong>Main Camera</strong></p></figcaption></figure>
{% endstep %}

{% step %}

### **Giving the player a camera holder**

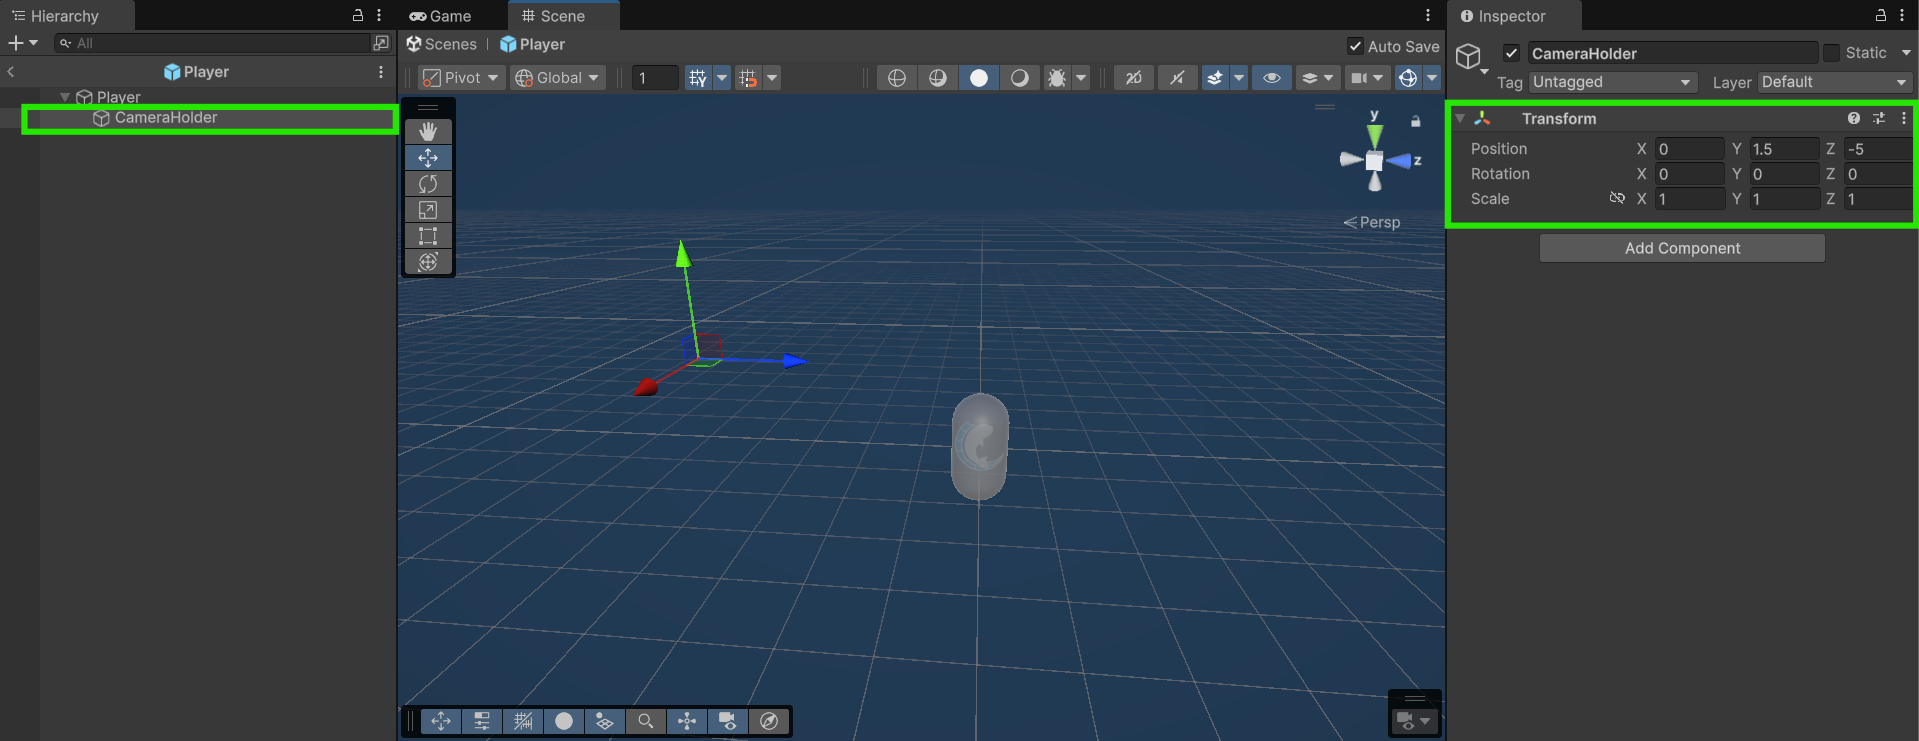
Now create an empty Game Object on your **Player Prefab** and position it where you'd like. This will be our container for the **Cinemachine** **Camera**.

<figure><img src="https://1328095063-files.gitbook.io/~/files/v0/b/gitbook-x-prod.appspot.com/o/spaces%2F-MheH2hMo3djr9VSyxTE%2Fuploads%2Fgit-blob-d5eb42f1704e356bad5654c7a4431da0d4ee078f%2Fcamera-holder-setup.png?alt=media" alt=""><figcaption><p>Camera Holder created on the Player Prefab</p></figcaption></figure>
{% endstep %}

{% step %}

### **Adding the Cinemachine Camera**

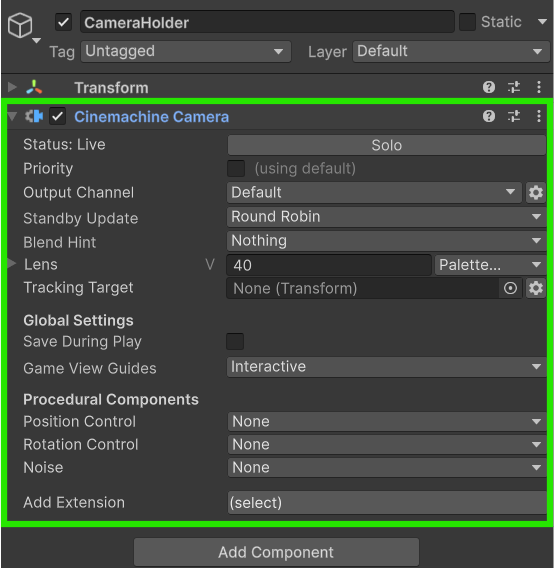
Now simply add the **Cinemachine Camera** component to the newly created **CameraHolder** game object.

<figure><img src="https://1328095063-files.gitbook.io/~/files/v0/b/gitbook-x-prod.appspot.com/o/spaces%2F-MheH2hMo3djr9VSyxTE%2Fuploads%2Fgit-blob-99d63a54b21ee4ae8344d6c241581e58d6fd14d1%2Fadded-cinemachine-camera.png?alt=media" alt=""><figcaption><p>The <strong>Cinemachine Camera</strong> added to the <strong>Camera Holder</strong></p></figcaption></figure>
{% endstep %}

{% step %}

### **Writing a PlayerCamera script**

Let's now add the following `PlayerCamera` script to the **Player Prefab** that we will use to take control of our **Camera** once our player spawns in.

{% code title="PlayerCamera.cs" lineNumbers="true" %}

```csharp
using FishNet.Object;
using Unity.Cinemachine;
using UnityEngine;

// This script will be a NetworkBehaviour so that we can use the OnStartClient override.
public class PlayerCamera : NetworkBehaviour
{
    [SerializeField] private CinemachineCamera _cinemachineCamera;

    // This method is called on the client after the object is spawned in.
    public override void OnStartClient()
    {
        // Simply enable our local cinemachine camera on the object if we are the owner.
        _cinemachineCamera.enabled = IsOwner;
    }
}
```

{% endcode %}

This script uses the [OnStartClient](/docs/guides/features/networked-gameobjects-and-scripts/network-behaviour-guides.md#onstartclient) override method from [NetworkBehaviour](/docs/guides/features/networked-gameobjects-and-scripts/network-behaviour-guides.md) to enable or disable the **Cinemachine Camera** component on the player objects depending on if they are our local player or not.
{% endstep %}

{% step %}

### **Assign your references to the script**

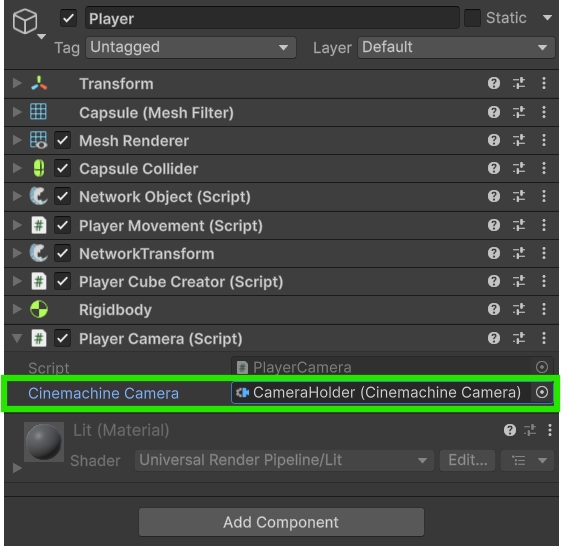
Now select the **Player Camera** component in your **Player Prefab** and add drag the **Camera Holder** game object into the *Cinemachine Camera* field to assign it the component.

<figure><img src="https://1328095063-files.gitbook.io/~/files/v0/b/gitbook-x-prod.appspot.com/o/spaces%2F-MheH2hMo3djr9VSyxTE%2Fuploads%2Fgit-blob-ff6692f34d7bbc74212d4f528fe00b6cf333100b%2Fassigned-cinemachine-camera-to-player.png?alt=media" alt=""><figcaption><p>The <strong>Player</strong> prefab with the <strong>Cinemachine Camera</strong> field filled in</p></figcaption></figure>
{% endstep %}

{% step %}

### **Test the camera in-game**

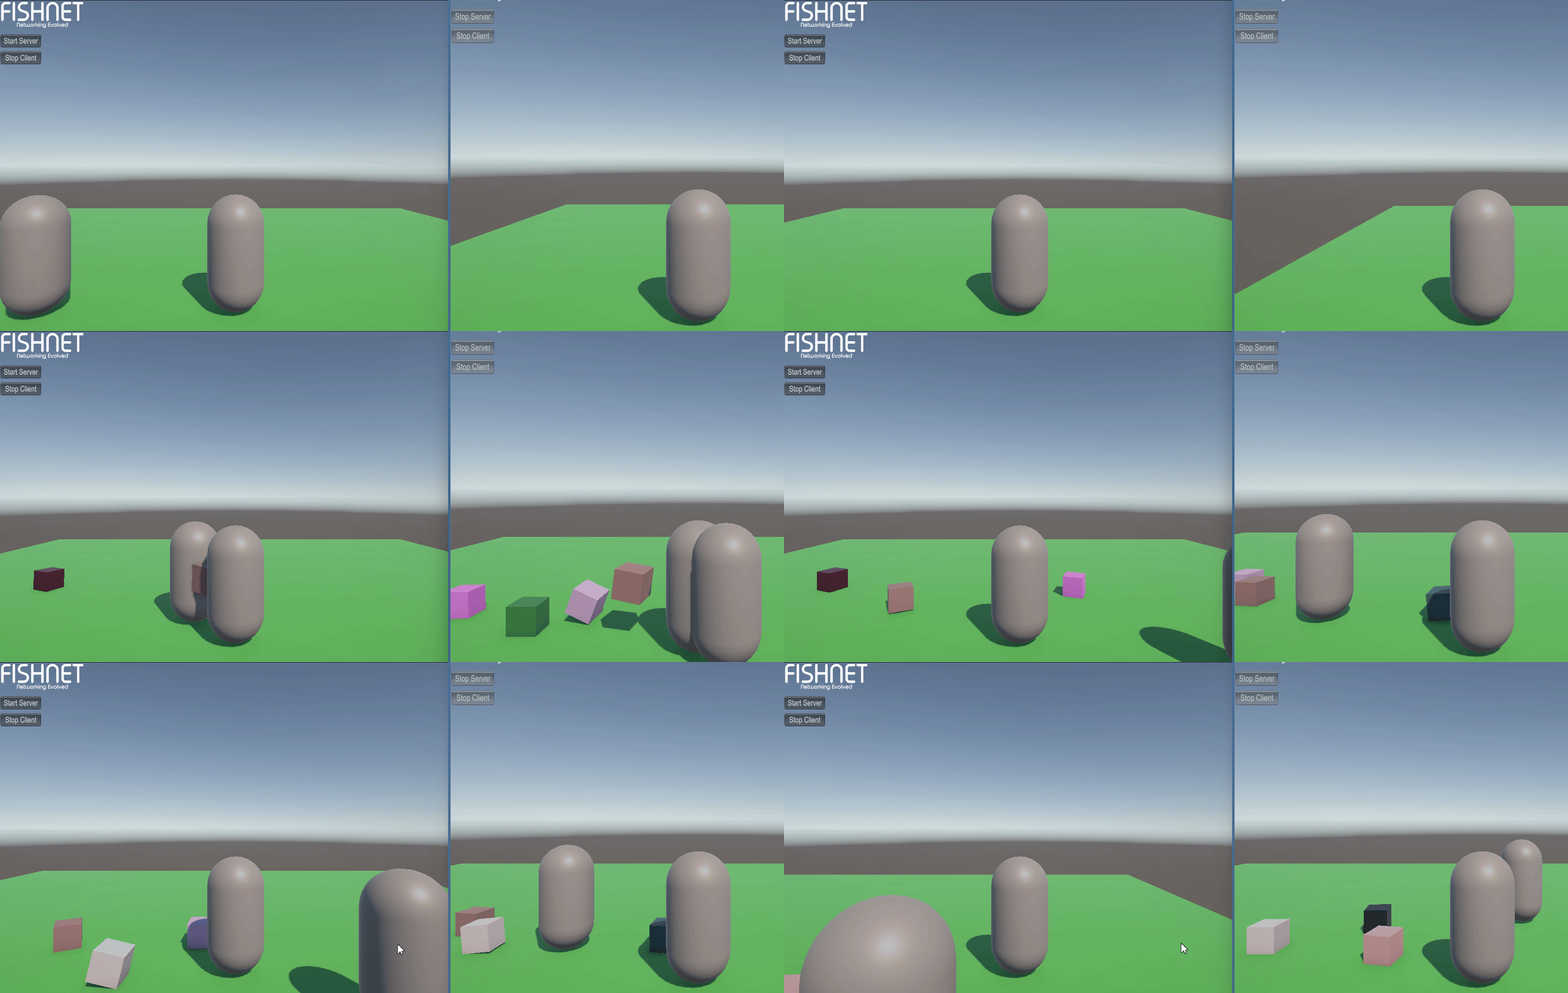
With all that set you should be able to run the game and see how the camera from the scene is controlled by only your local player.

<figure><img src="https://1328095063-files.gitbook.io/~/files/v0/b/gitbook-x-prod.appspot.com/o/spaces%2F-MheH2hMo3djr9VSyxTE%2Fuploads%2Fgit-blob-21faa218a12f7a56397f568d9d1b3c25672c64dc%2Fplayer-camera-demonstration.gif?alt=media" alt=""><figcaption><p>Demonstration of the local camera</p></figcaption></figure>
{% endstep %}
{% endstepper %}

{% hint style="info" %}
Download the project files with these completed steps here, or explore the repository:

<a href="https://github.com/maxkratt/fish-networking-getting-started/releases/download/basic-setup-with-cinemachine/basic-setup-with-cinemachine.unitypackage" class="button primary" data-icon="down-to-line">Source Files</a> <a href="https://github.com/maxkratt/fish-networking-getting-started/tree/cinemachine-camera" class="button secondary" data-icon="github">Repository</a>
{% endhint %}